PebbleHost
Warning
Due to sharing an IP address with other PebbleHost users (who may also be hosting a Discord bot), you are more likely to encounter rate limits. It should be fine, but you should consider other hosting options if you have a large guild and tickets are critical.
Also, note that although it may be possible, running Discord Tickets alongside other bots in the same process is not recommended or supported. Consider getting a VPS if you want to run multiple bots.
Installation
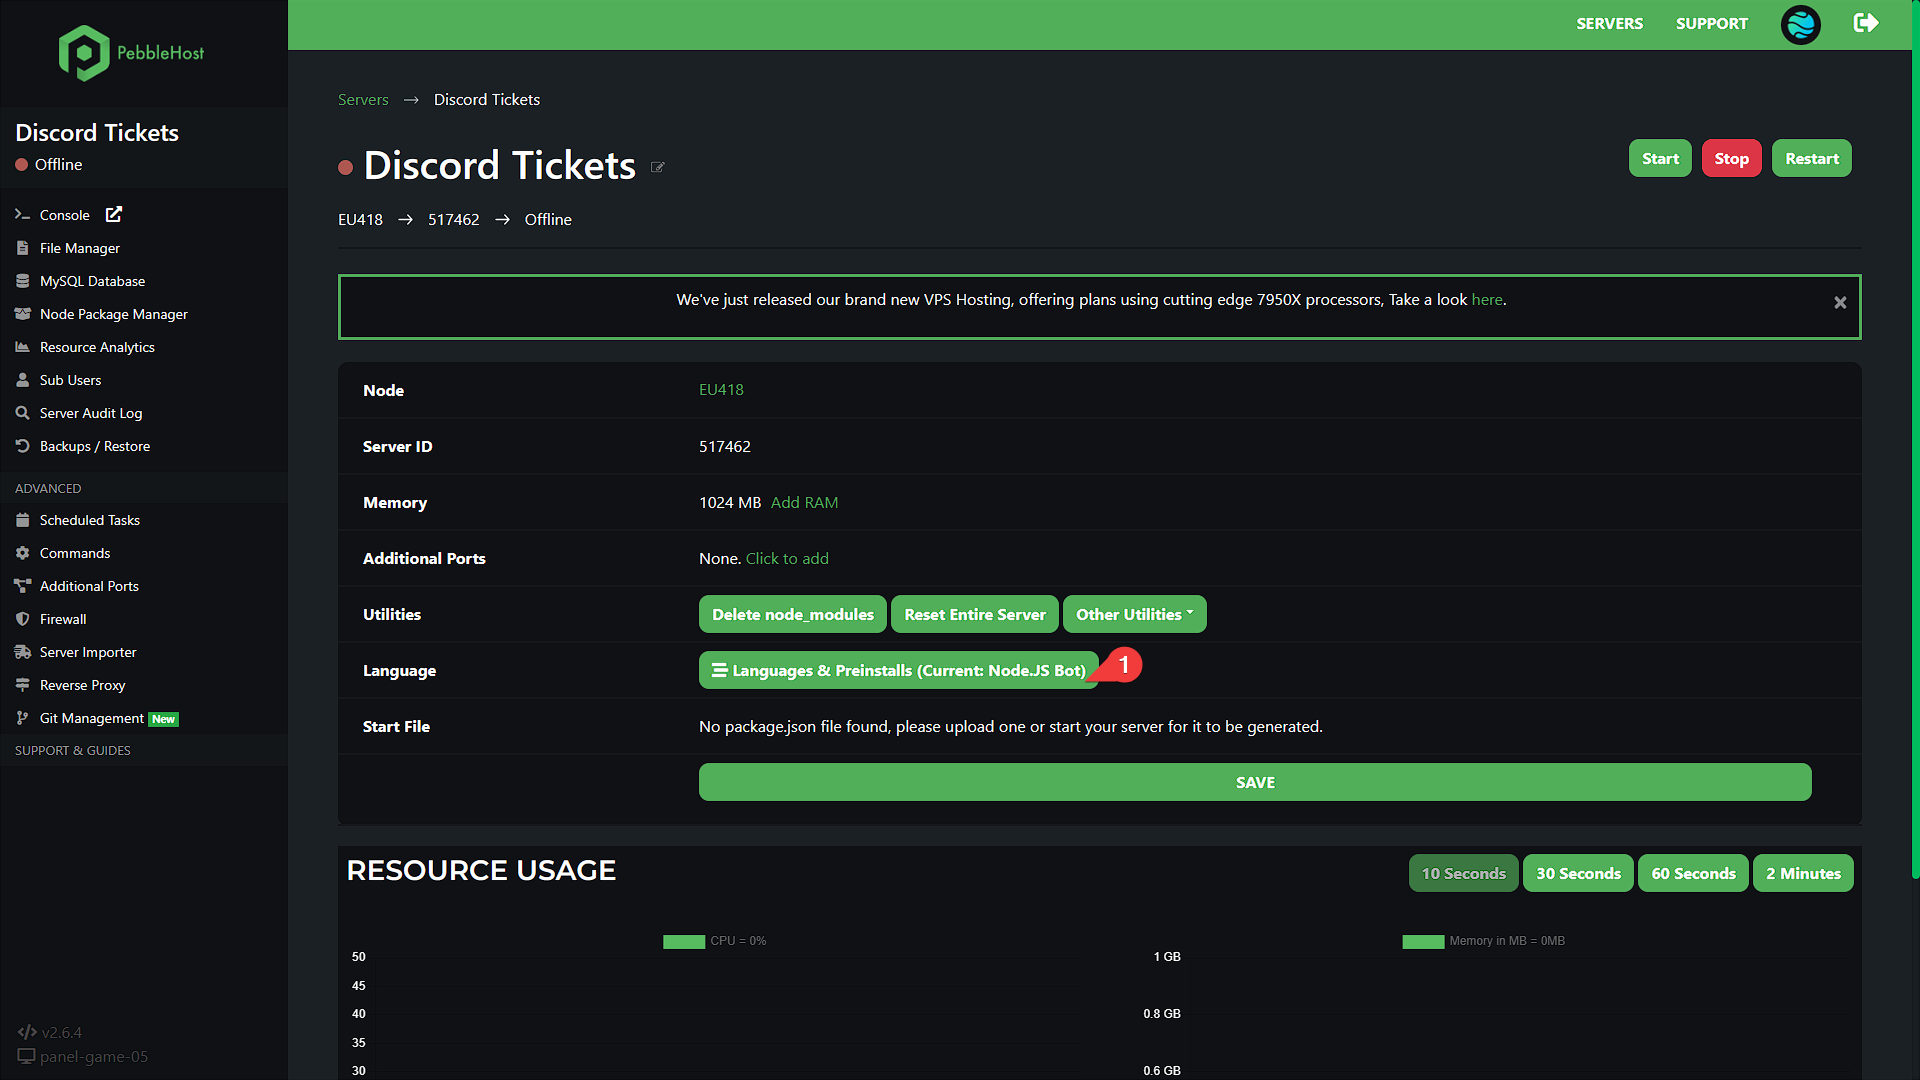
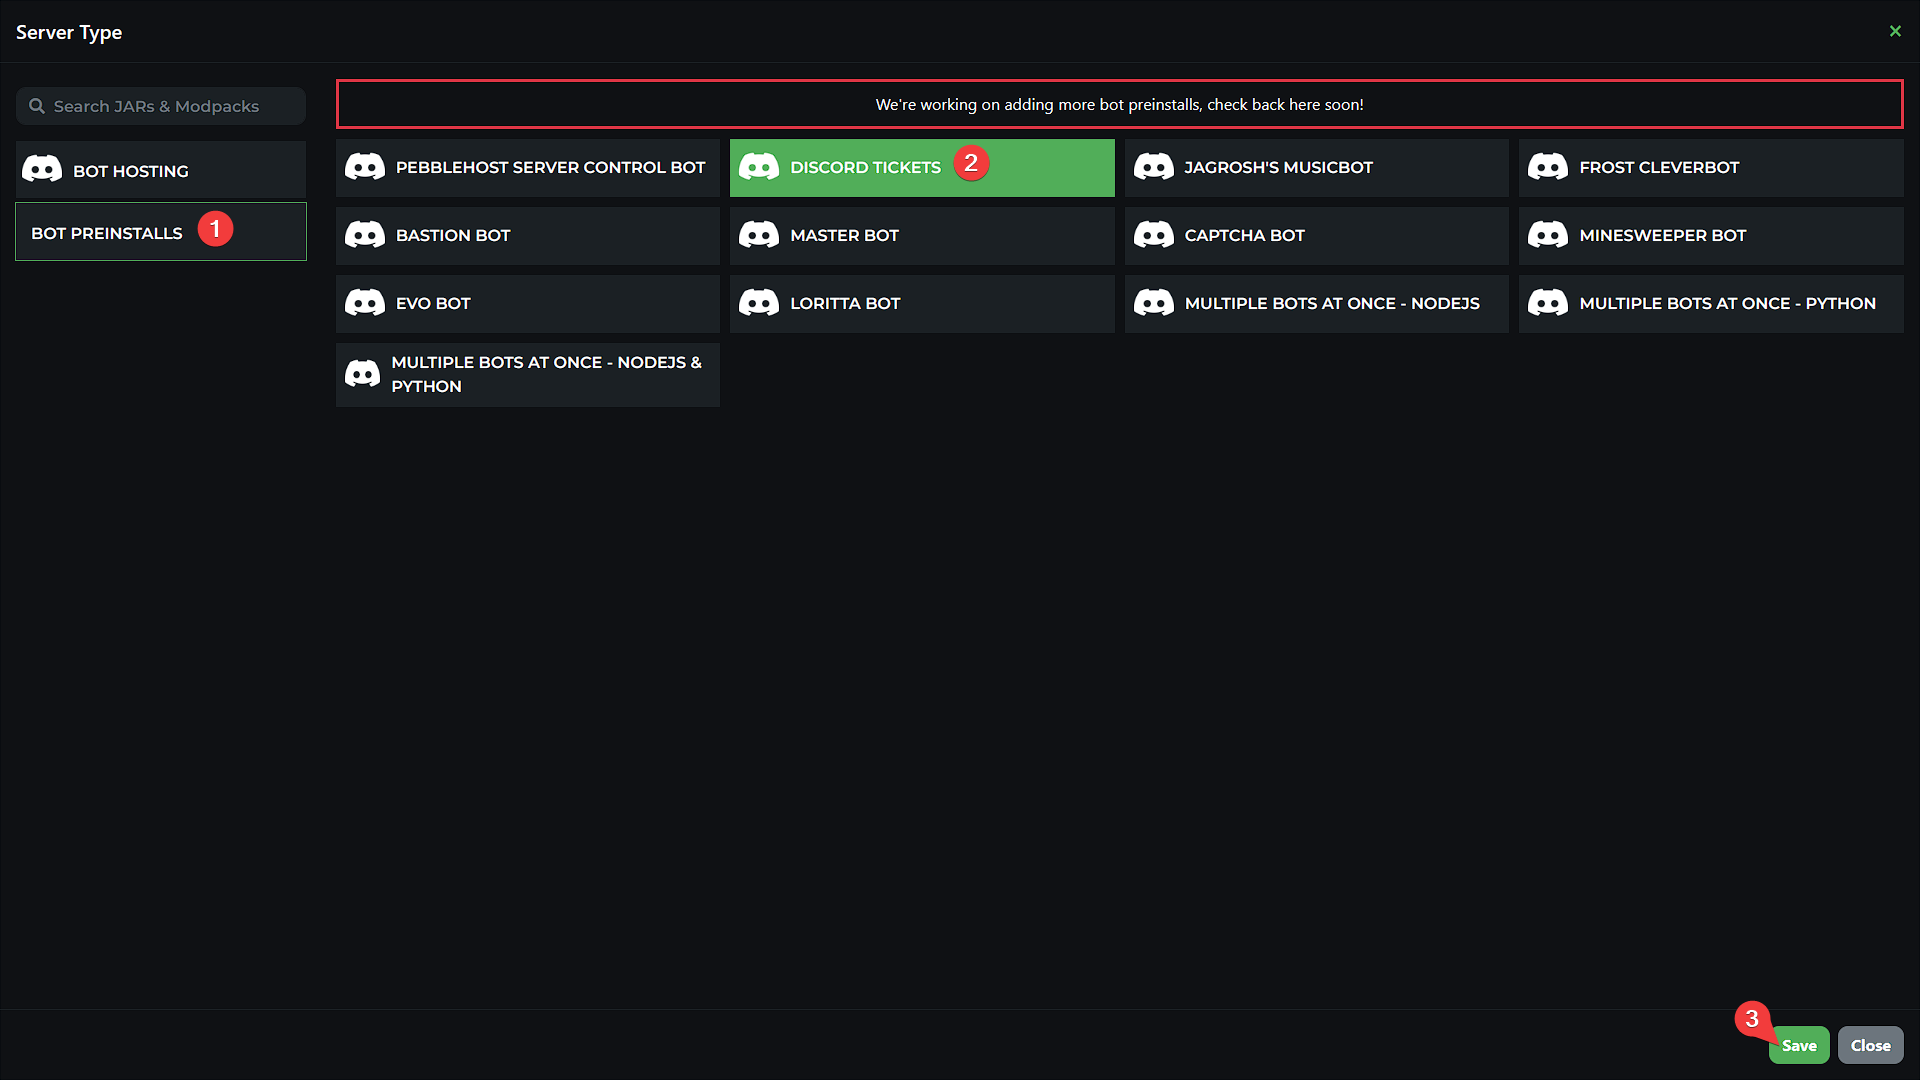
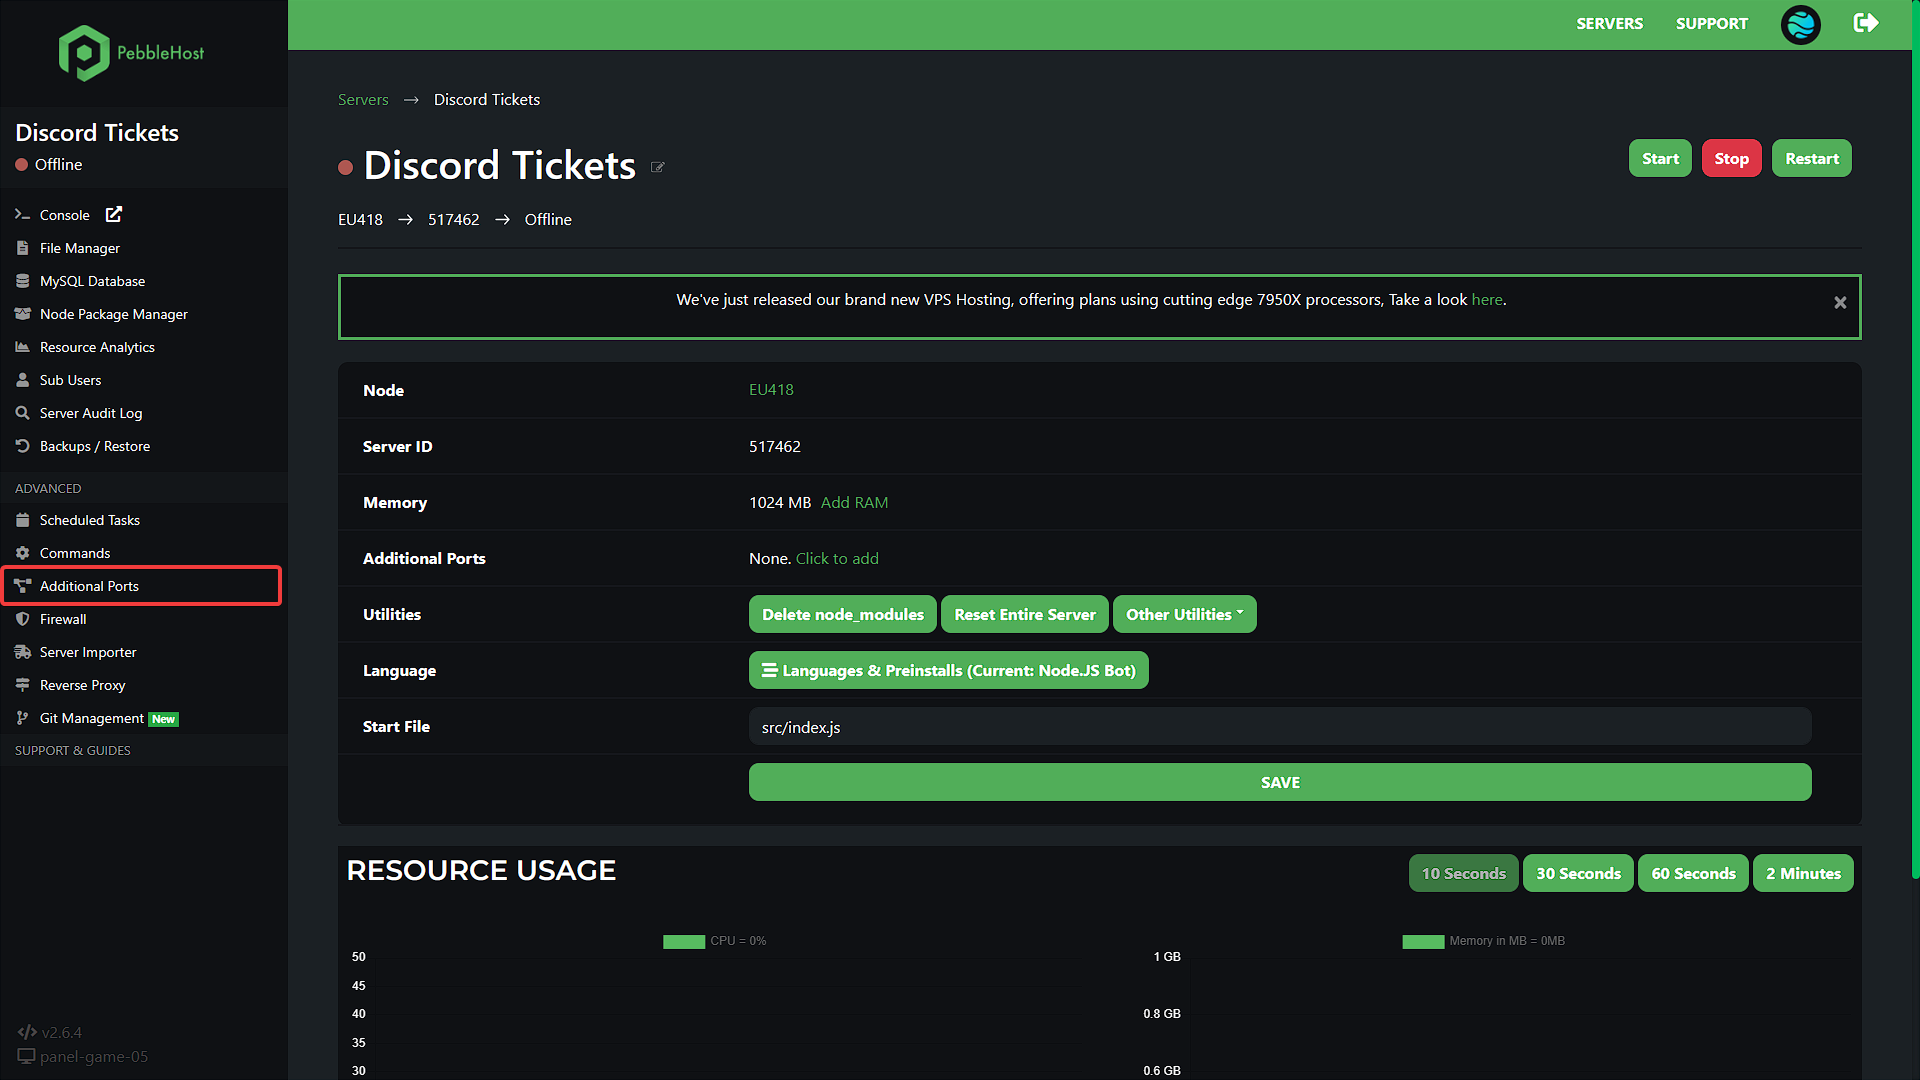
First, click on Language & Preinstalls, then Bot Preinstalls, select Discord Tickets and save.
Start the server to use the installer which will download the code for you.
When it has finished, start the server a second time to install the dependencies and generate the .env file.
It may take a few minutes to install.
Environment variables
Go to the File Manager and open the .env file.
Creating the Discord application
Warning
Don't skip this section if you already know how to create a Discord application; Discord Tickets requires additional configuration. Using an existing application is not recommended.
-
Go to the Discord Developer Portal
-
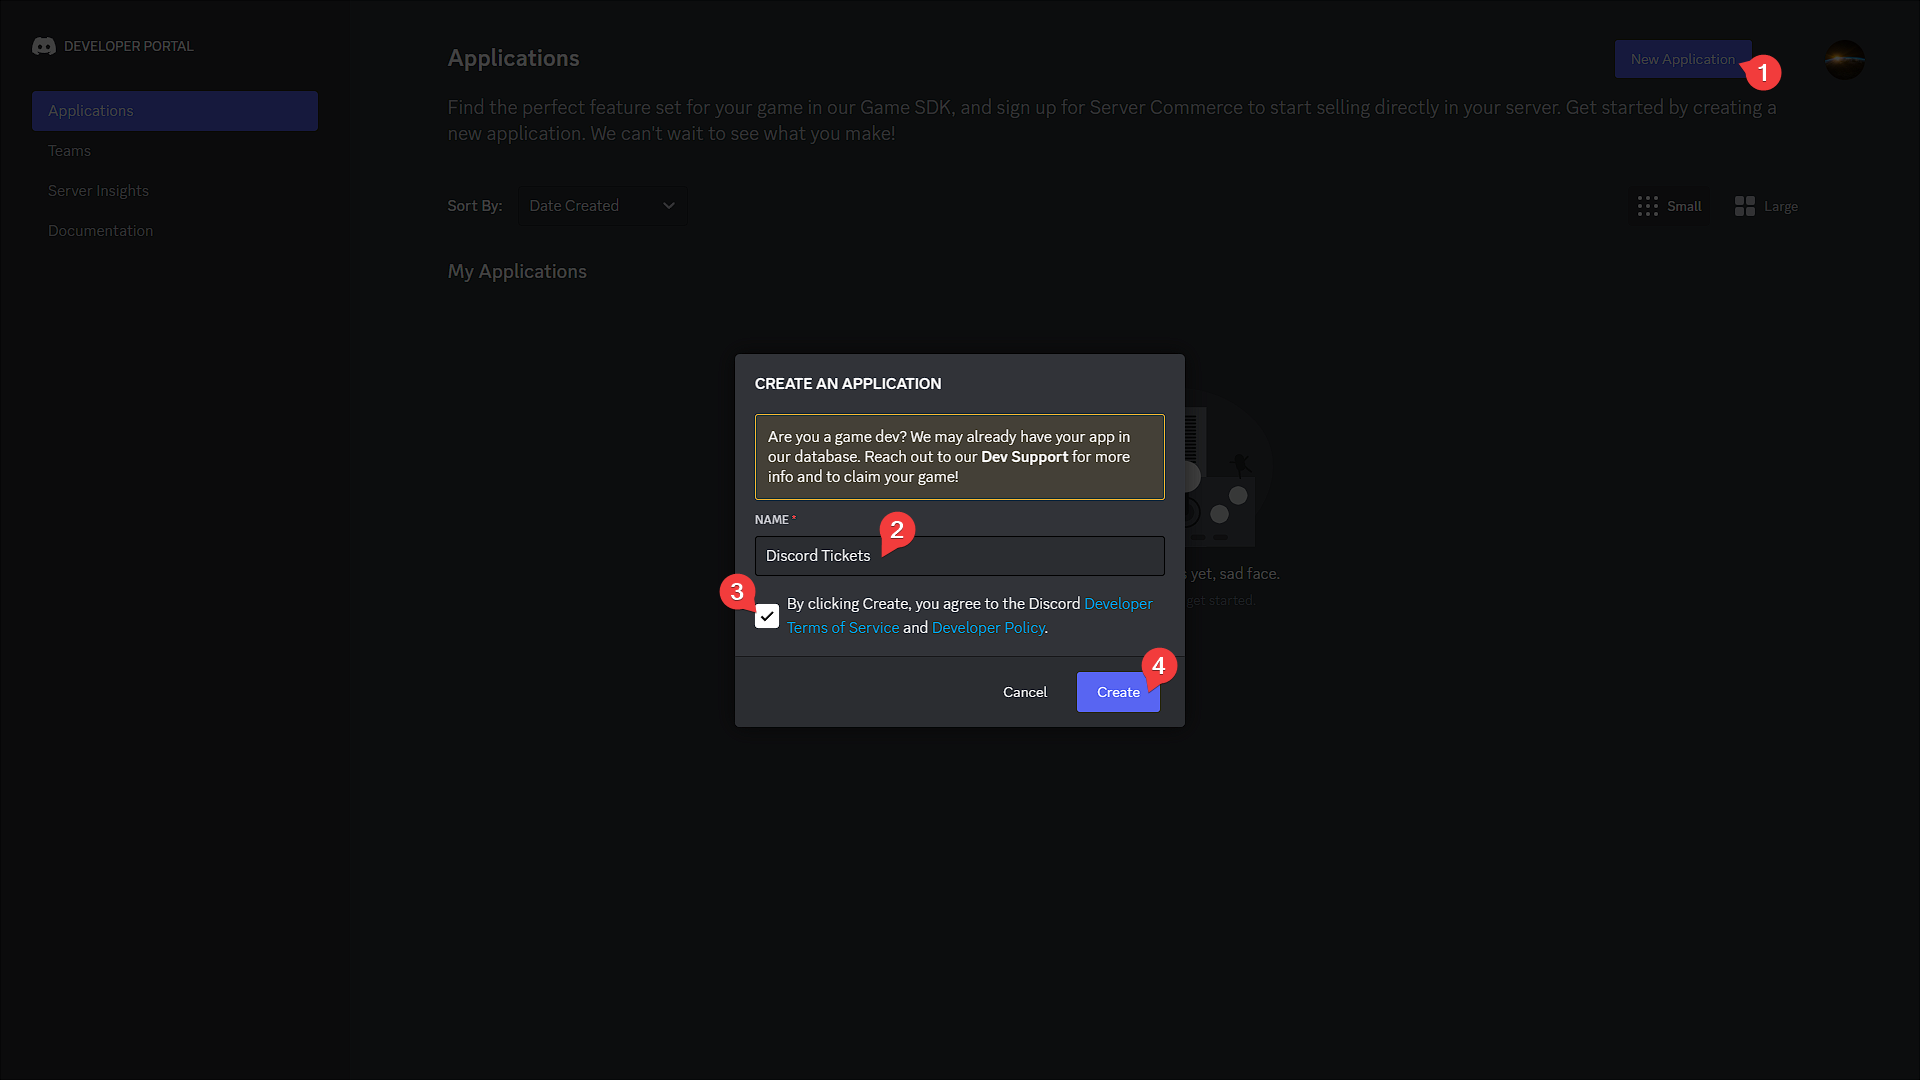
Create an application
- Click the
New Applicationbutton - Give your application a name, accept the terms of service and click
Create
 3. Add a logo, description, and links to your terms of service and privacy policy, then click
 Save Changes.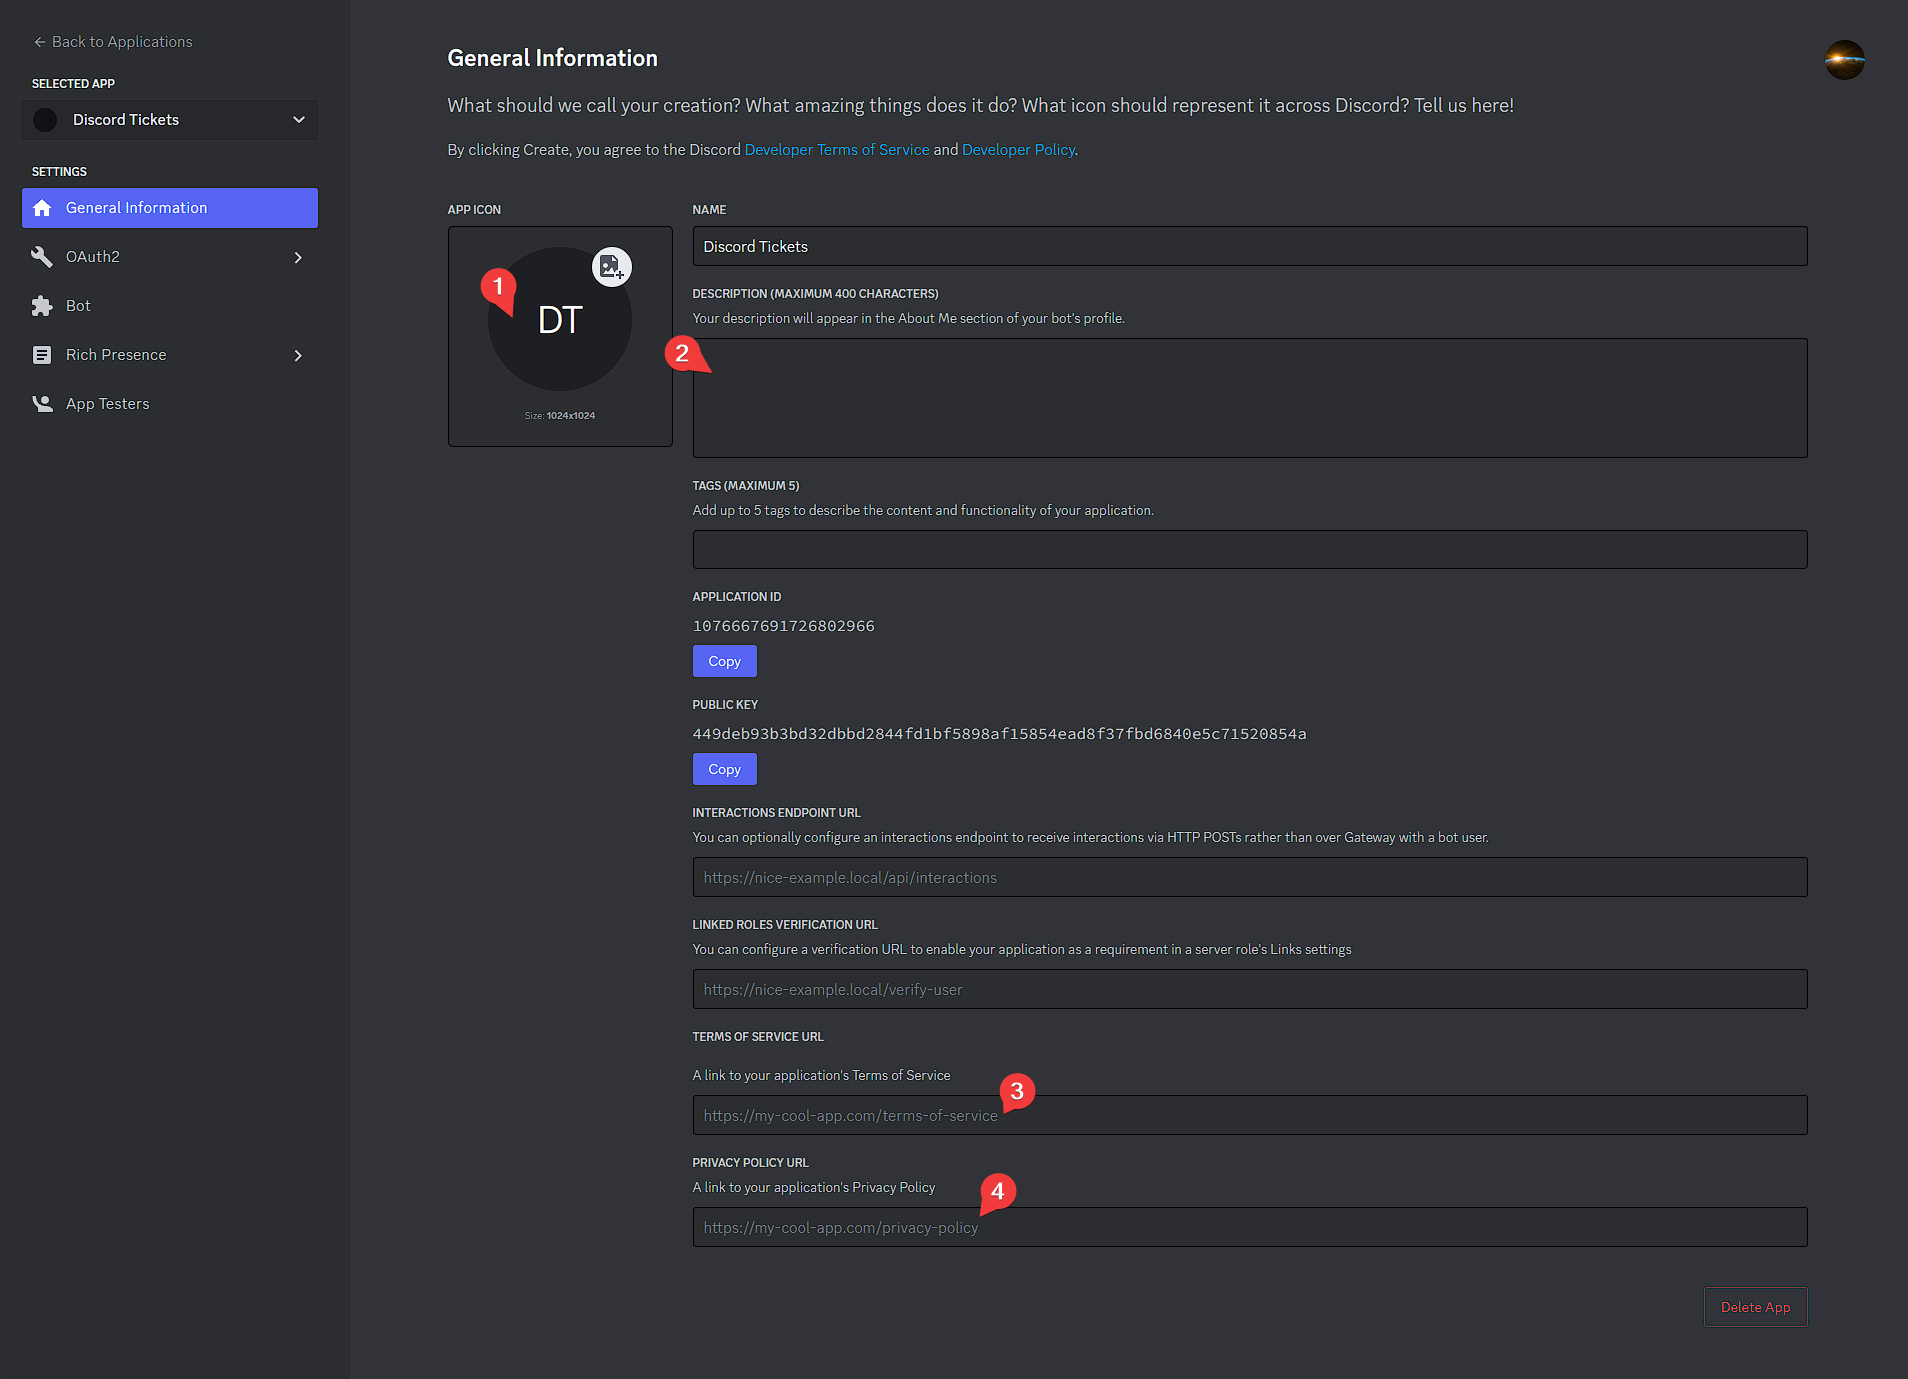 4. Go to the
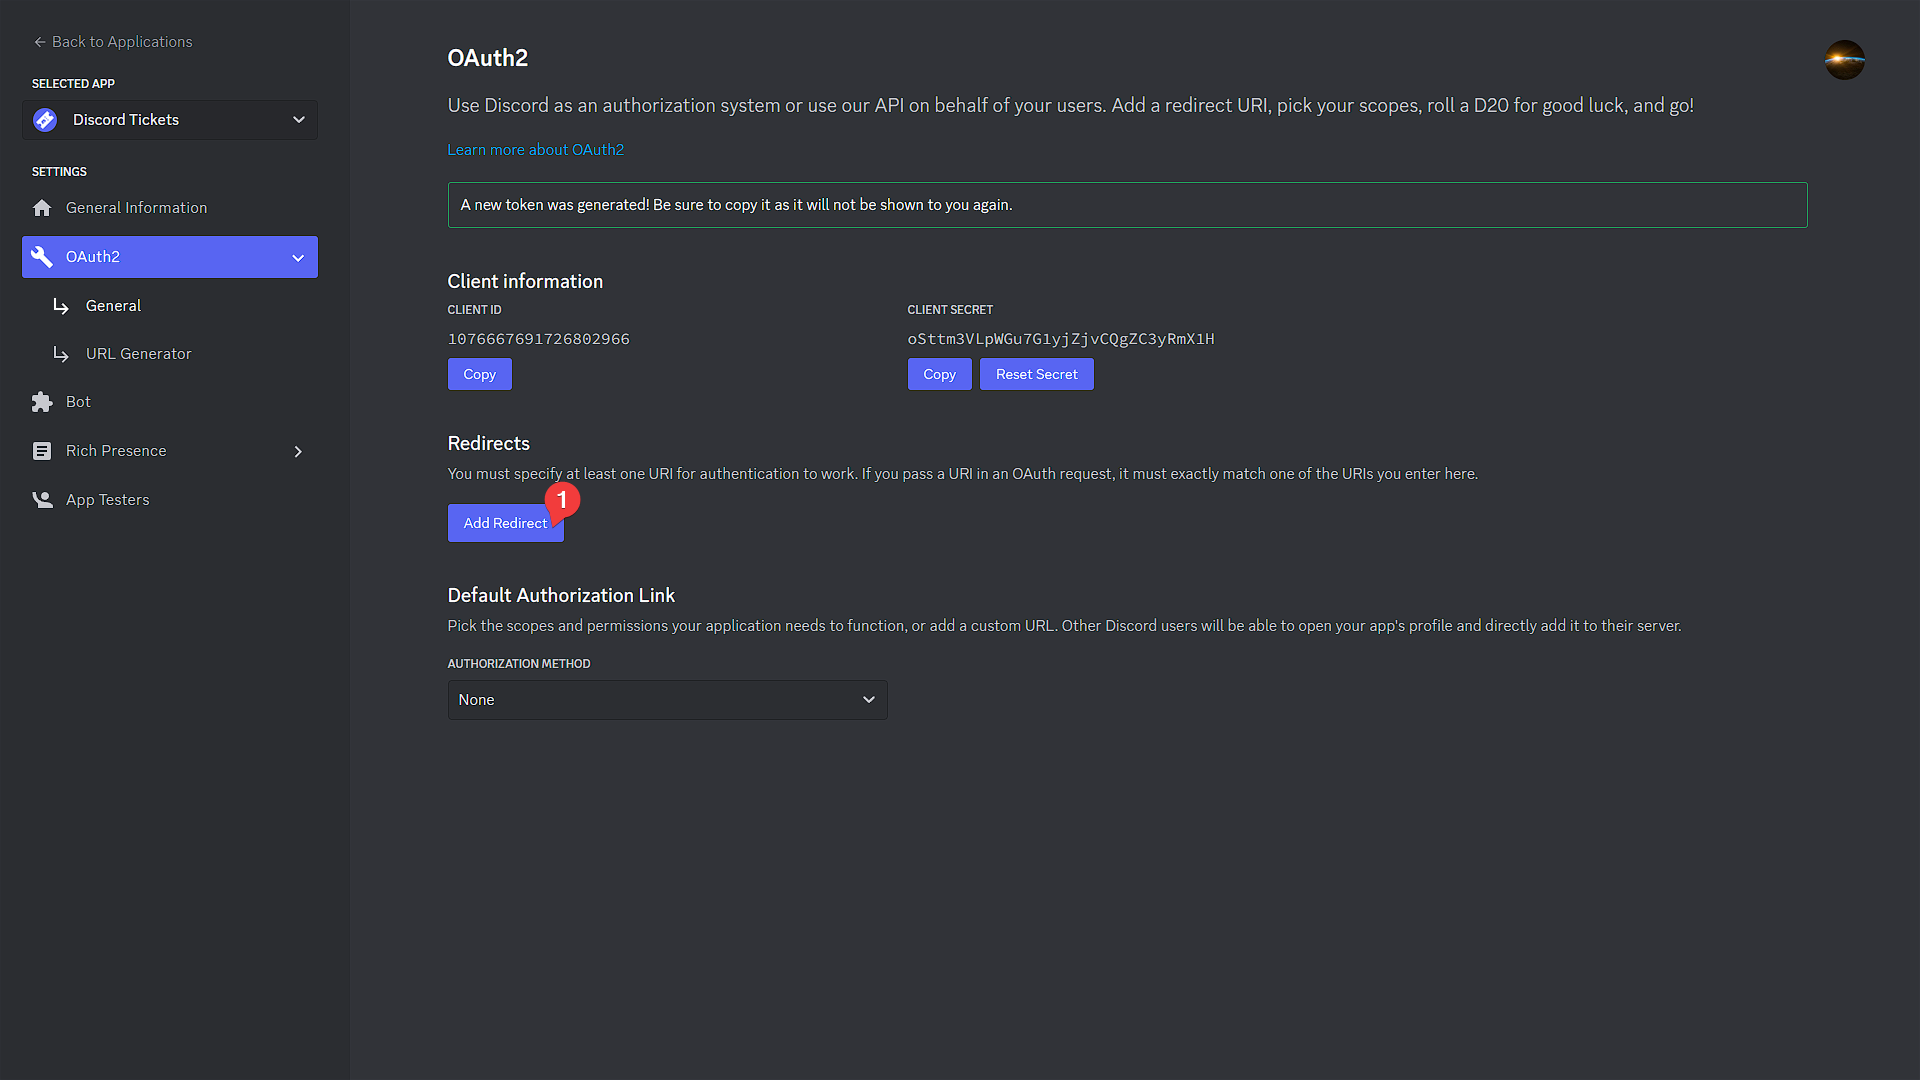
 OAuth2page and clickReset Secret, thenYes, do it!. Copy the new secret and set it as yourDISCORD_SECRETenvironment variable.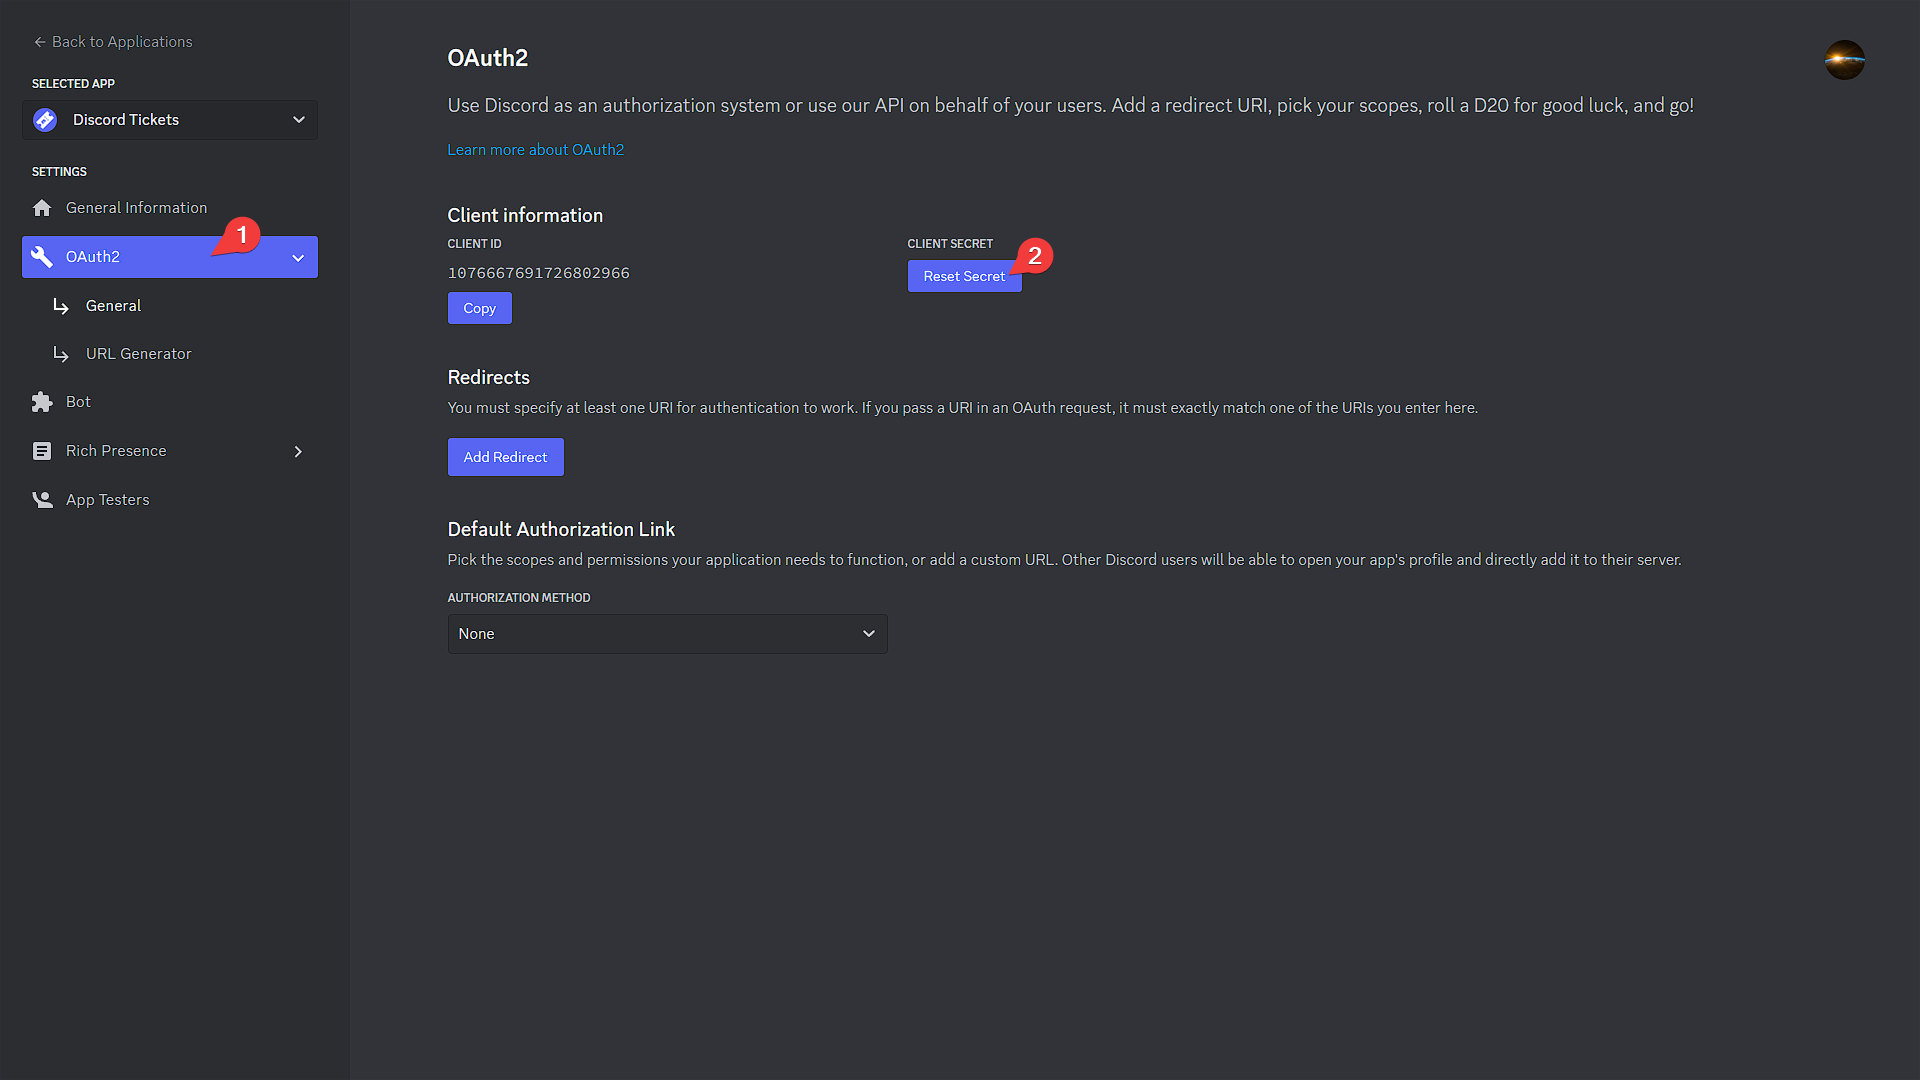 5. Click
 Add Redirectand enter the value of yourHTTP_EXTERNALenvironment variable, followed by/auth/callback. Then clickSave Changes.Examples
http://12.345.67.89:8080/auth/callbackhttps://tickets.example.com/auth/callback
If you set this to
https://tickets.example.com/auth/callback, yourHTTP_EXTERNALenvironment variable must be set tohttps://tickets.example.com(without a trailing/).- Go to the
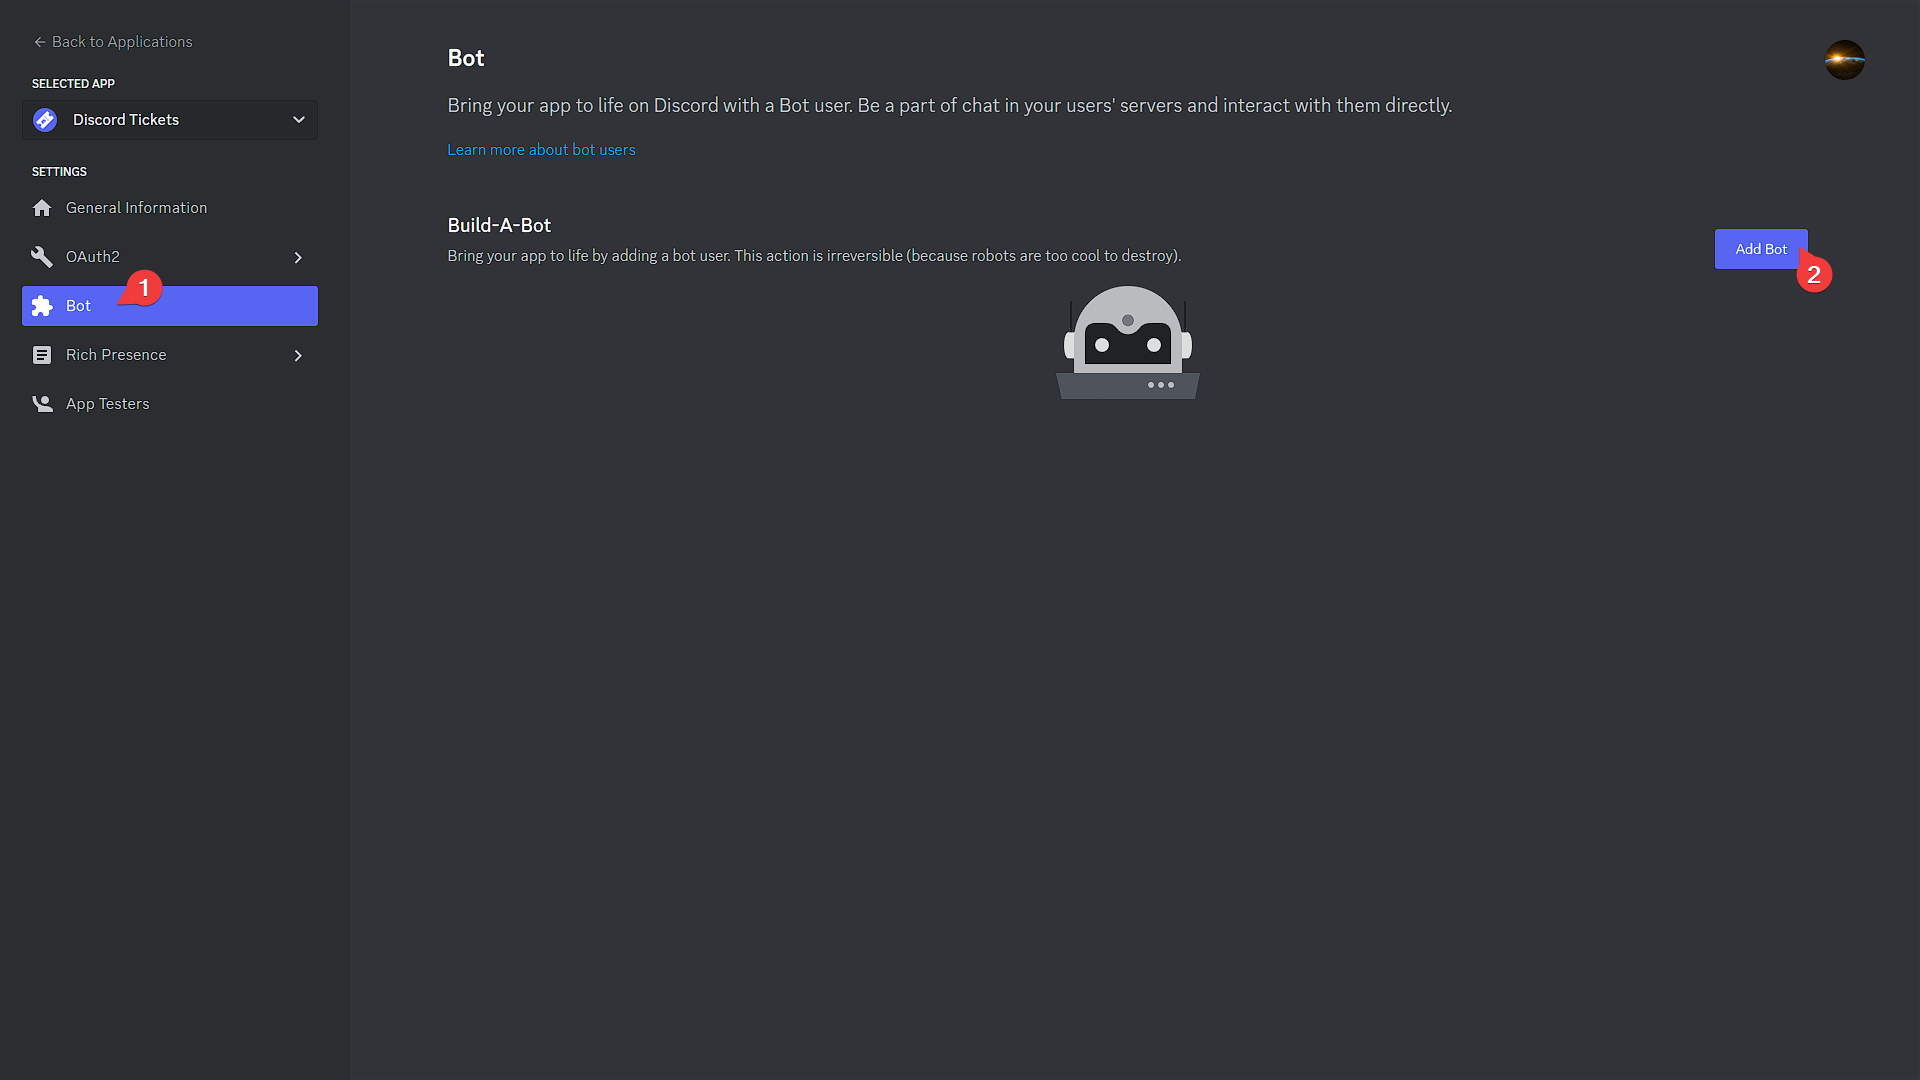
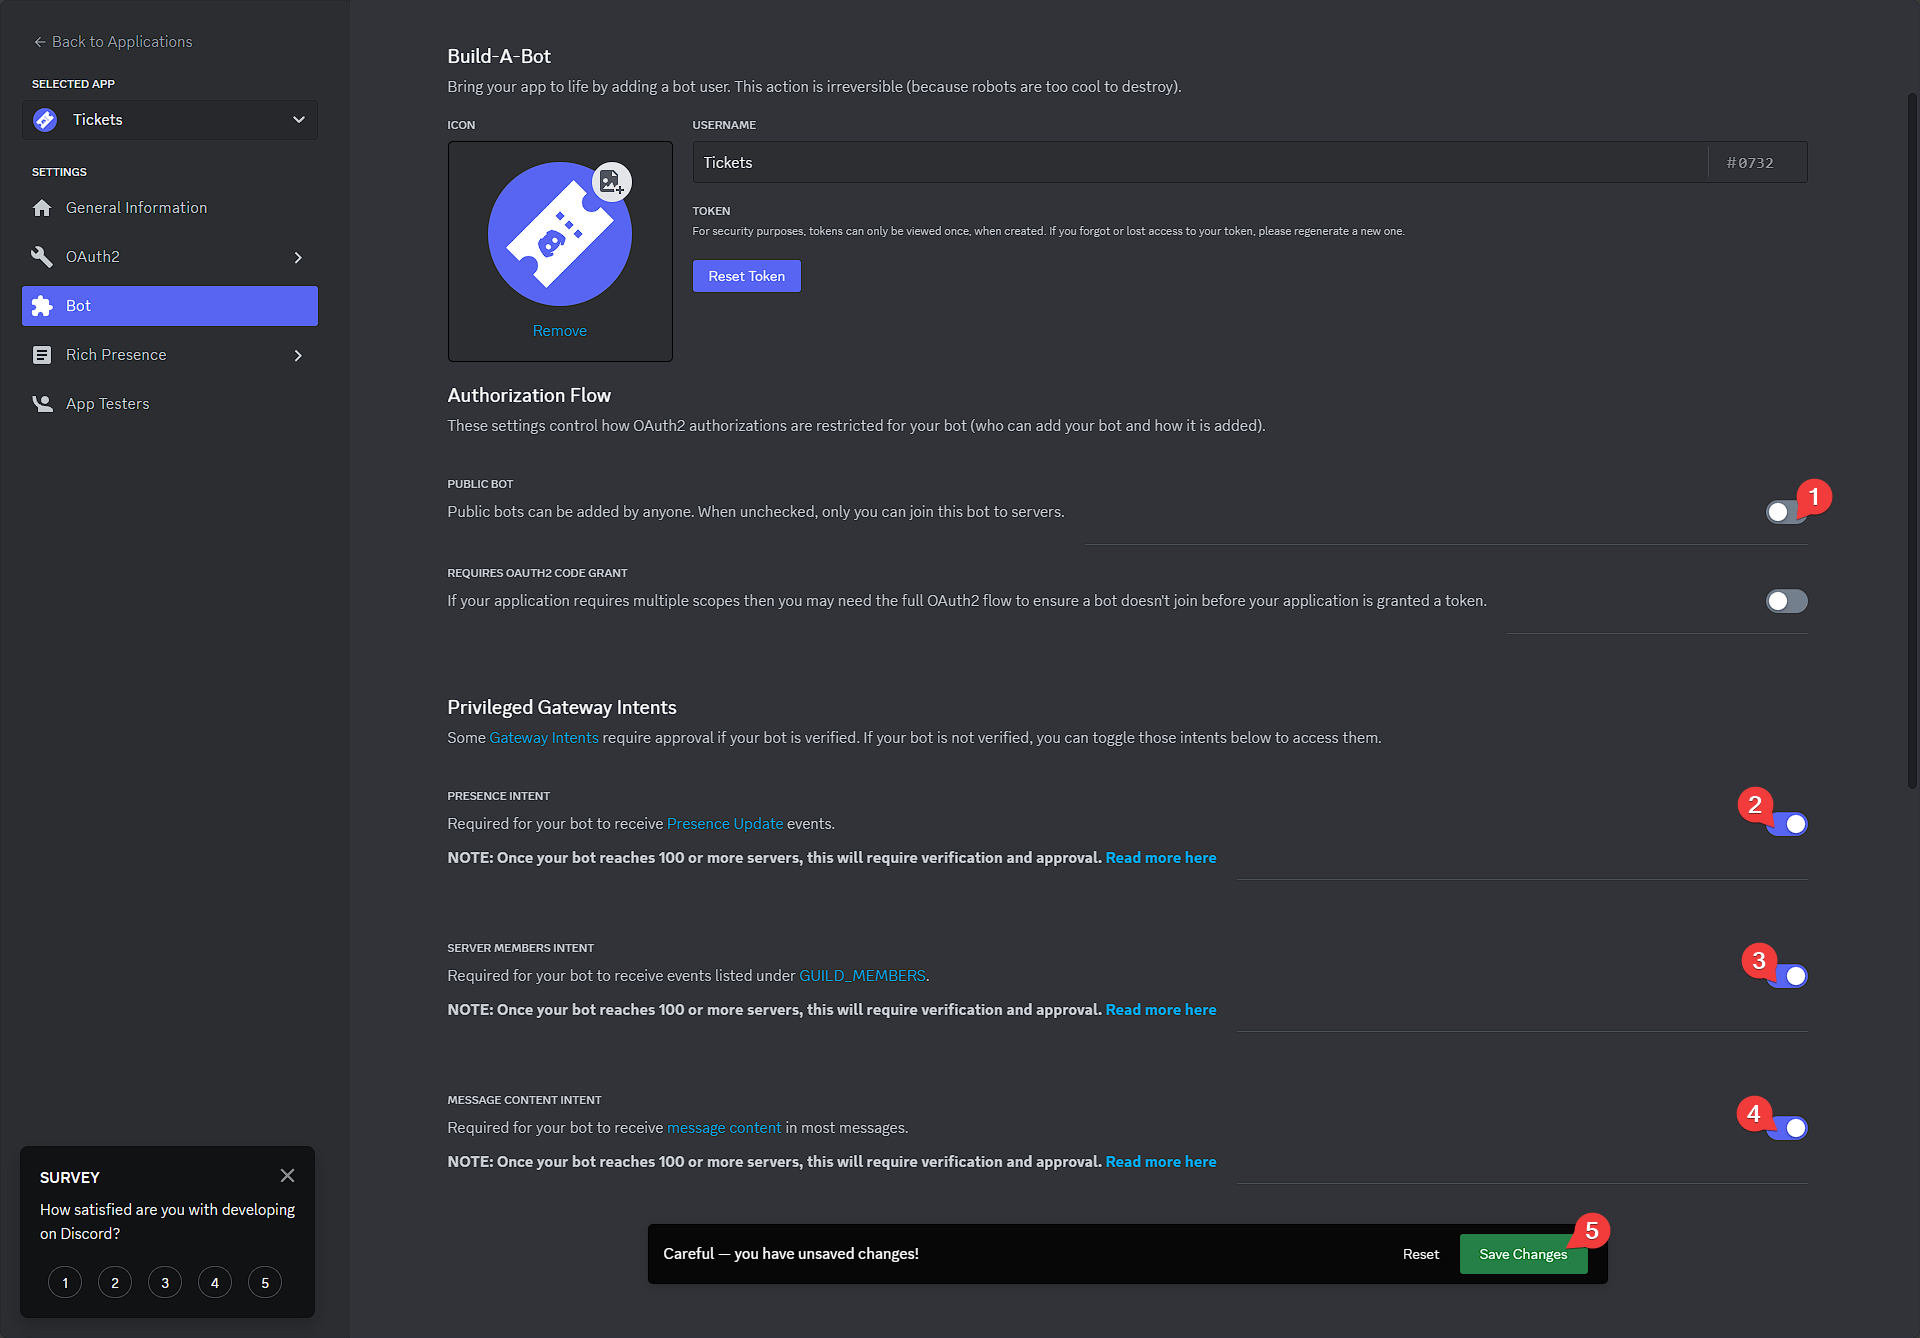
Botpage and clickAdd Bot, thenYes, do it! - Click
View Token, then copy the token and set it as yourDISCORD_TOKENenvironment variable.
- Optionally, disable the "public bot" option to prevent other people from adding your bot to their servers.
- Enable the
presence,server membersandmessage contentintents.
- Click the
Don't add the bot to your Discord server yet; you'll do that later.
Database
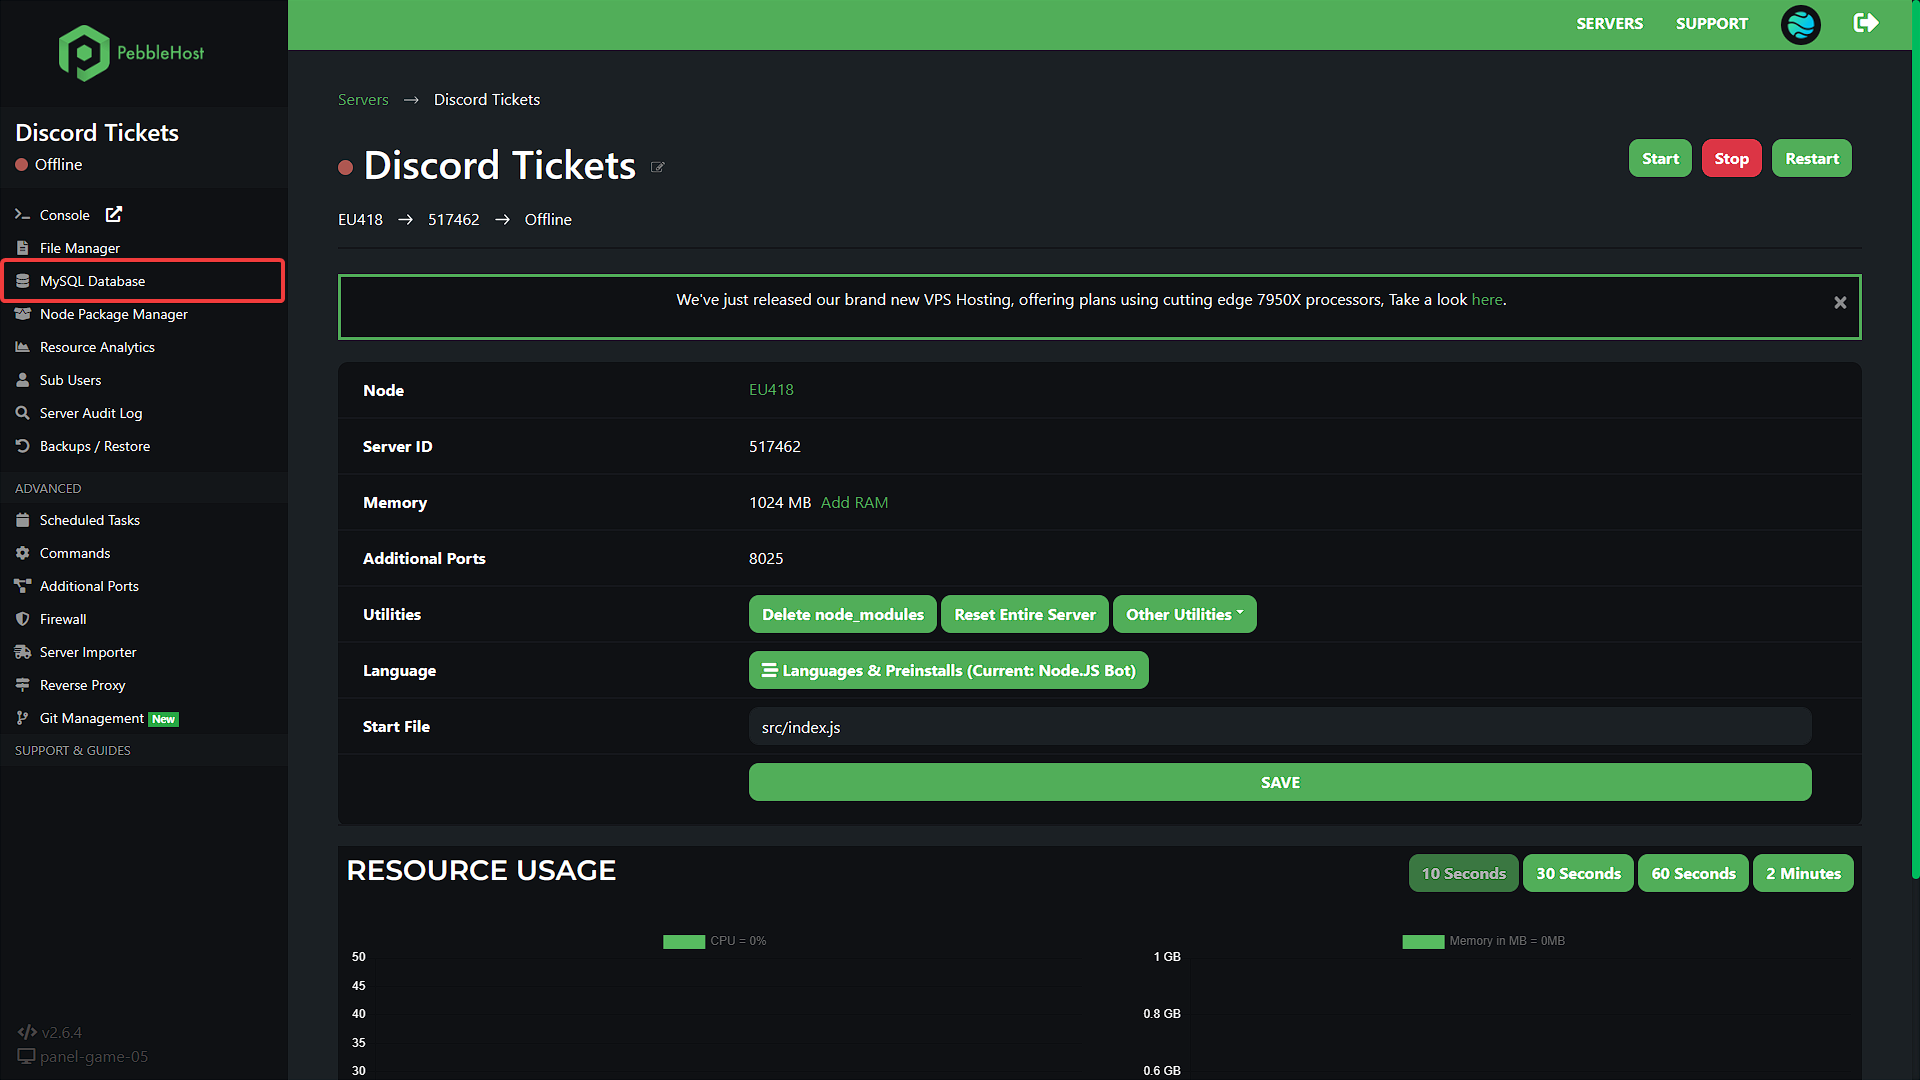
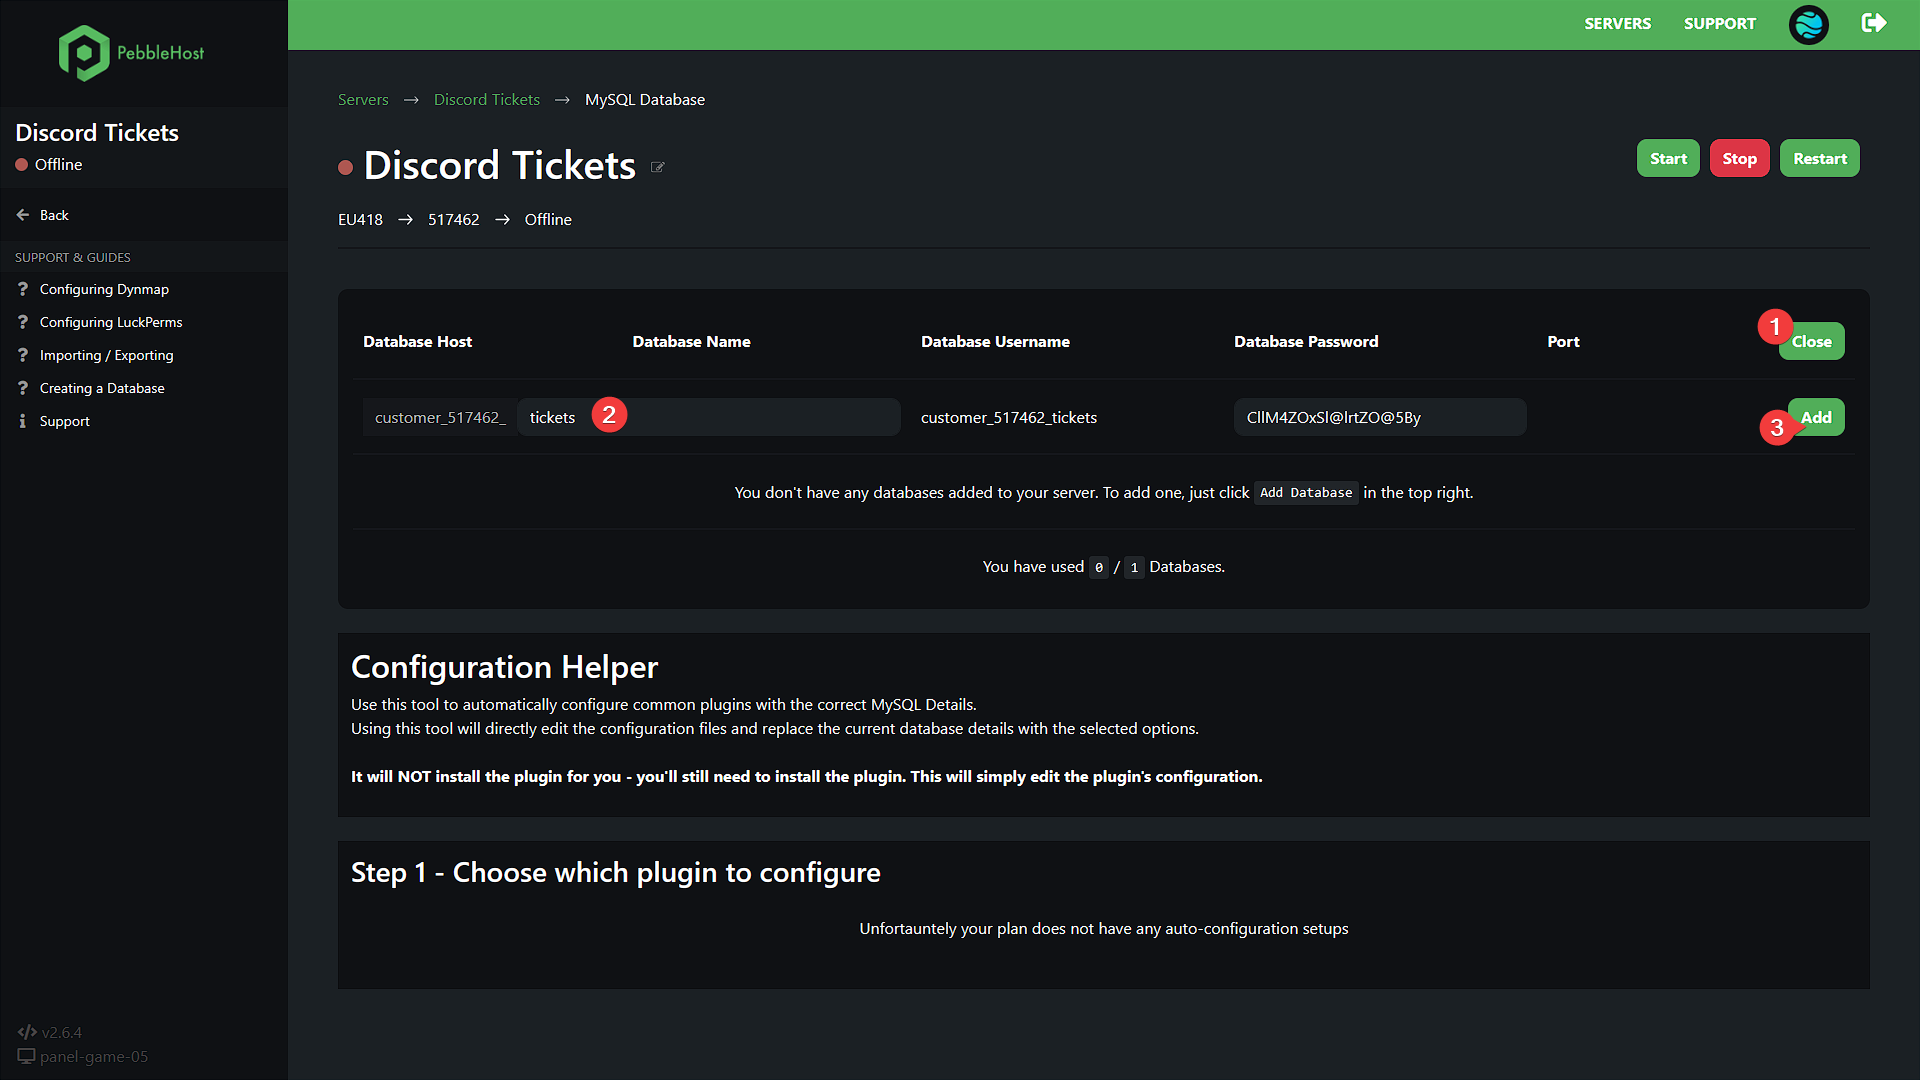
From the sidebar, click MySQL Database and create a new database.
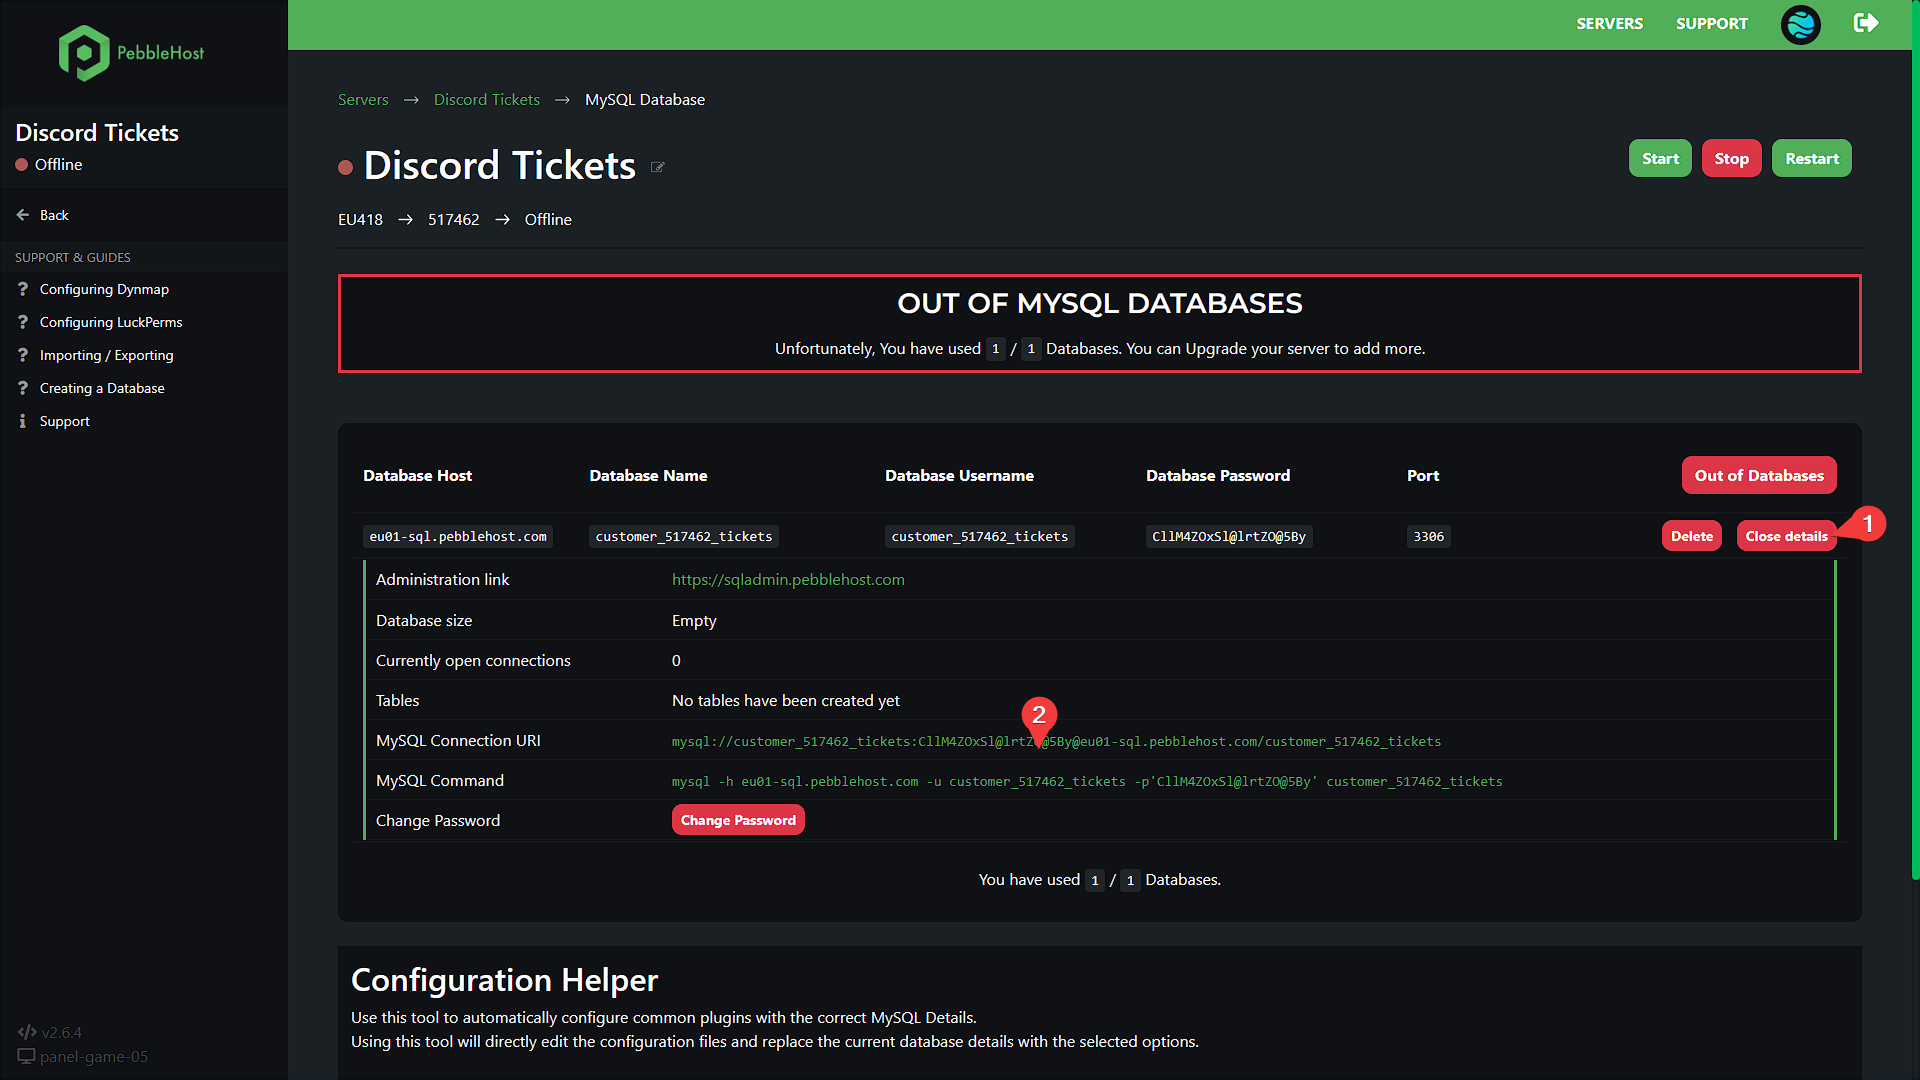
Open the details and click on the URI to copy it.
| Example | |
|---|---|
1 2 | |
Web server
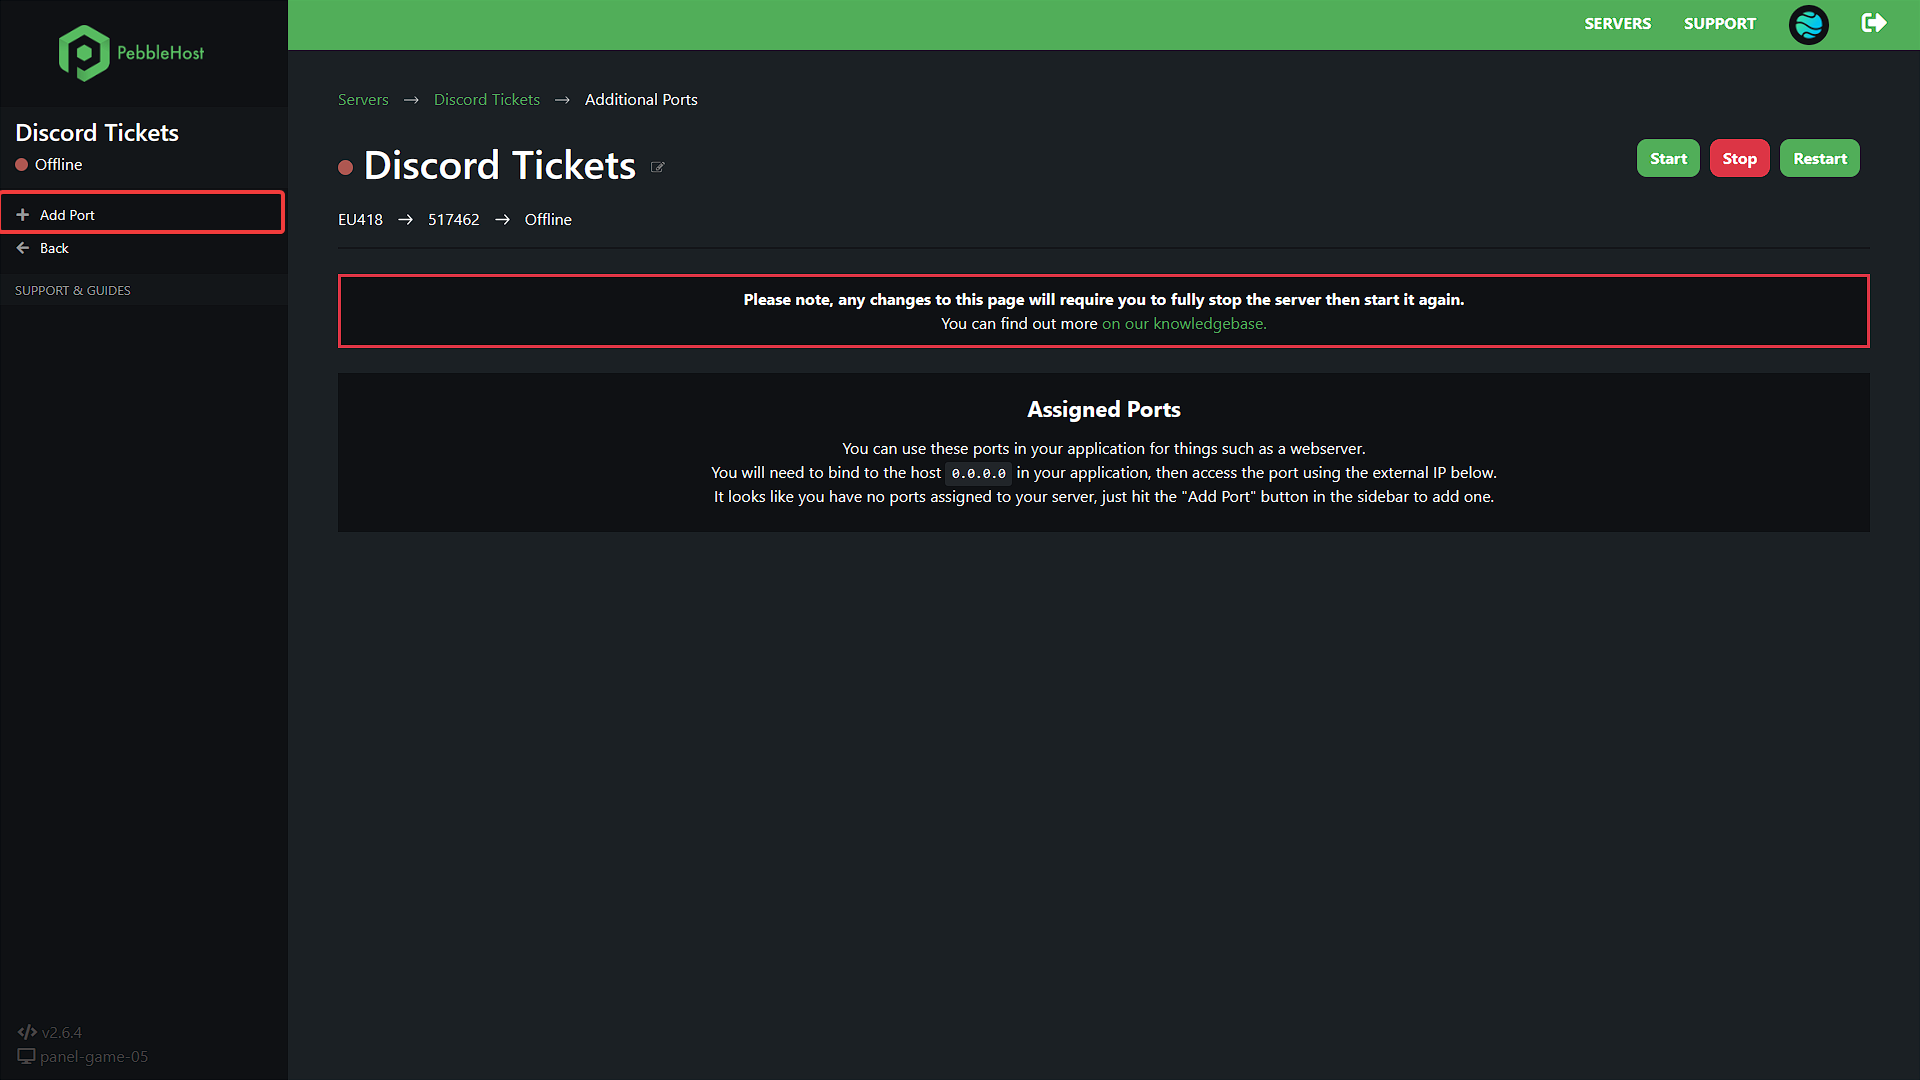
From the sidebar, click Additional Ports, then Add Port. Copy the IP address and port number.
| Example | |
|---|---|
1 2 3 | |
Reverse proxy
If you have a domain name, refer to PebbleHost's guide to enable the reverse proxy.
Set the HTTP_TRUST_PROXY environment variable to true and change HTTP_EXTERNAL accordingly (e.g. https://tickets.example.com).
Other environment variables
Your .env file should now look something like this:
Tip
You can middle-click on links to open them in a new tab so you can easily come back to the documentation!
Refer to the configuration documentation for more information about the available environment variables, and return to this page when you have finished.
Publishing the commands
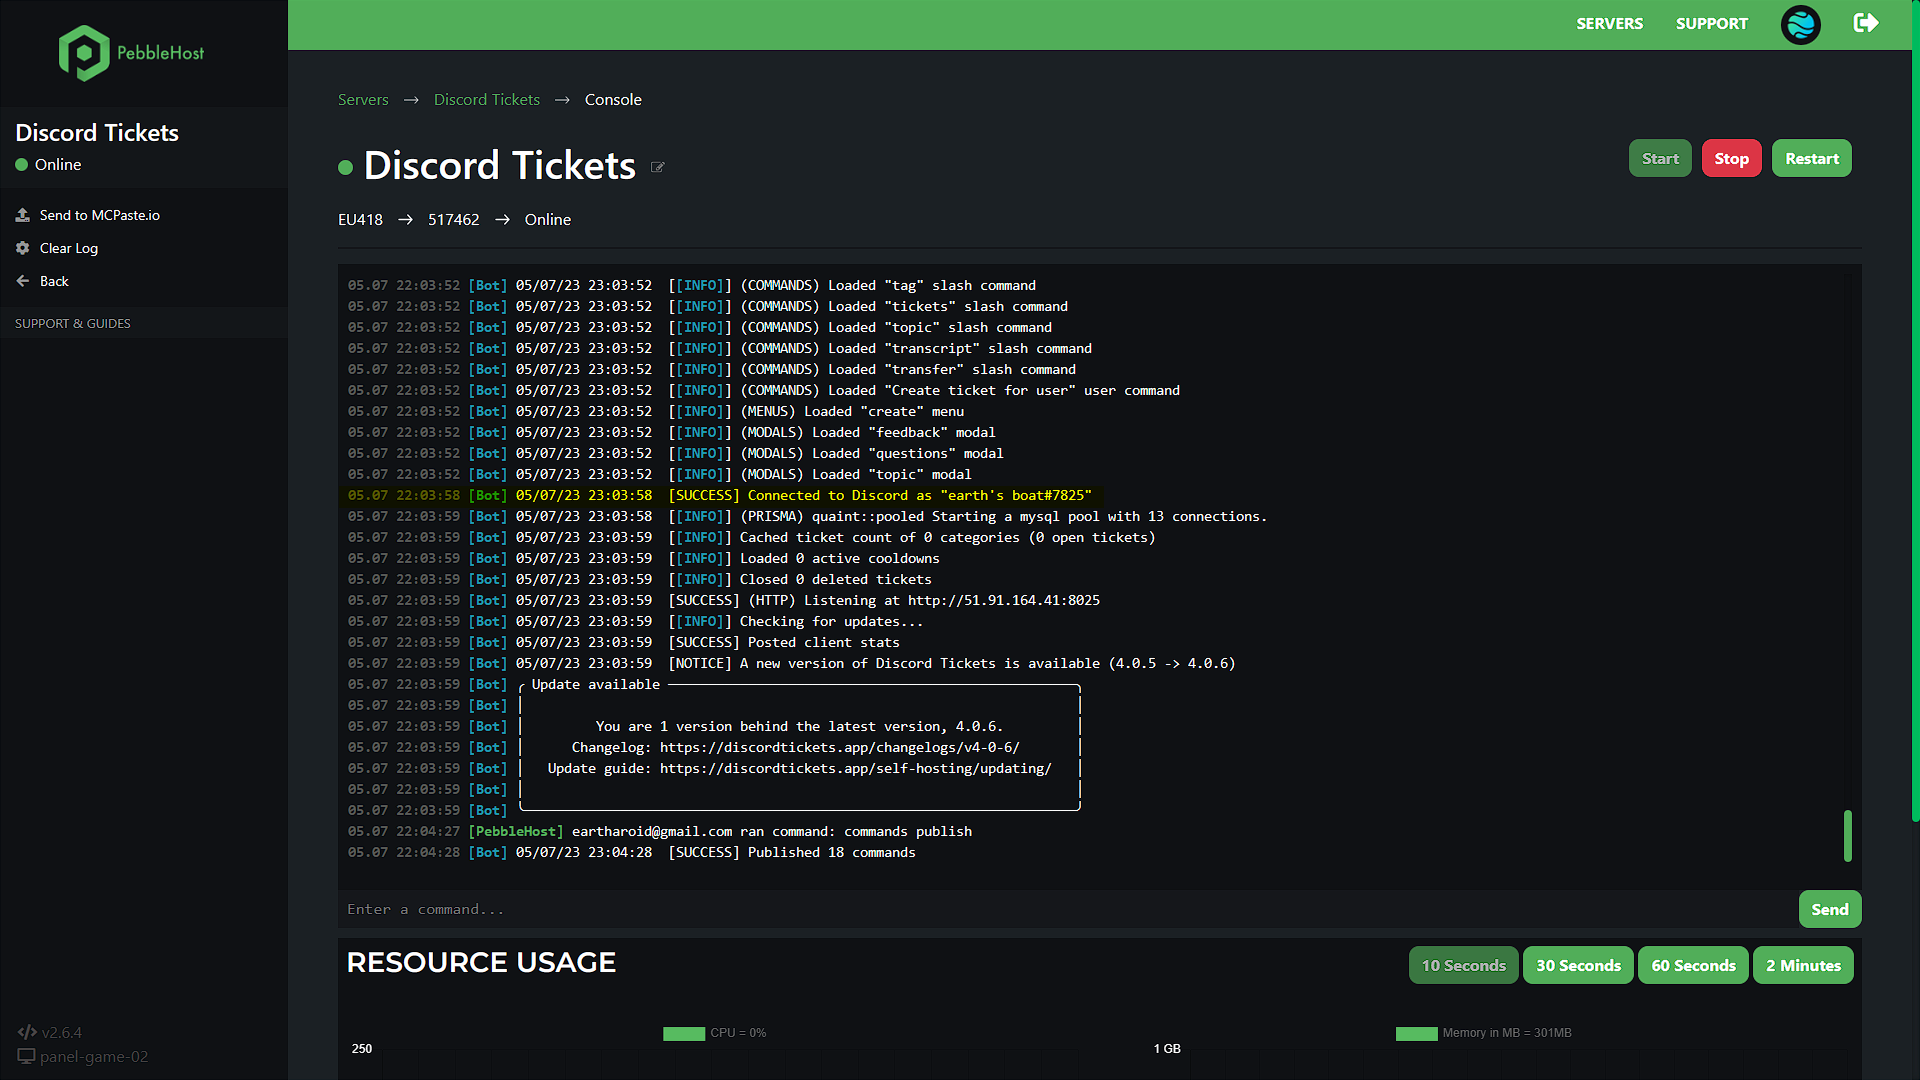
Start the server and wait until you see "Connected to Discord".
Then type commands publish into the bot's console to publish the commands to Discord.
Next steps
If your bot is running, congratulations, you have successfully installed Discord Tickets, and now it's time to set it up in your Discord server.
Join the community on Discord and get notified when updates (with new features and fixes) are released.
Refer to the configuration guide for a step-by-step guide on how to add and configure the bot in your server.
Having trouble?
If you haven't got the bot running yet and need help, you can ask for help on Discord or on GitHub.
